 Kia Soul: Rheostat Inspection
Kia Soul 2014-2019 PS Service Manual / Body Electrical System / Lighting System / Rheostat Inspection
| 1. |
Disconnect the negative (-) battery terminal.
|
| 2. |
Remove the crash pad lower panel.
(Refer to Body - "Crash Pad Lower Panel")
|
| 3. |
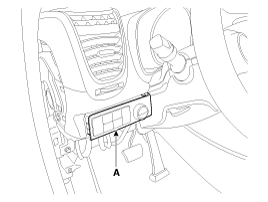
Remove the lower crash pad switch assembly (A) by pushing
it.
|
| 4. |
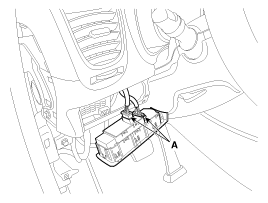
Disconnect the connectors (A) from the lower crash pad switch
assembly.
|
| 5. |
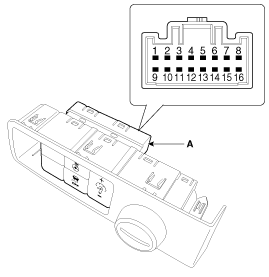
Remove the rheostat switch (A).
|
| 6. |
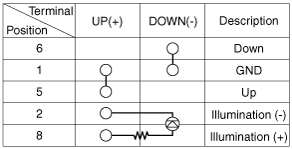
Check for intensity of rheostat switch. If the light intensity
of the lamps changes smoothly without any flickering when the rheostat
is turned, it can be assumed that the rheostat is normal.
|
 Hazard Lamp Switch Installation
1.
Install the hazard switch in the center airvent assembly.
2.
Connect the connector and install the center airvent assembly.
...
 Fog Lamps Inspection
Fog Lamp Switch
1.
With the fog lamp switch in each position, make sure that
continuity exists between the terminals below. If continuity is
not as speci ...
See also:
Glove box lamp
The glove box lamp comes on when the glove box is opened.
To prevent unnecessary charging system drain, close the glove box securely after
using the glove box. ...
Warnings and indicators
All warning lights are checked by turning the ignition switch ON (do not start
the engine). Any light that does not illuminate should be checked by an authorized
Kia dealer.
After starting the en ...
Road warning
Hazard warning flasher
The hazard warning flasher serves as a warning to other drivers to exercise extreme
caution when approaching, overtaking, or passing your vehicle.
It should be used when ...


