 Kia Soul: Rear Glass Installation
Kia Soul 2014-2019 PS Service Manual / Body (Interior and Exterior) / Panorama Sunroof / Rear Glass Installation
|

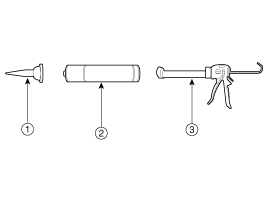
 Sealant nozzle
 Adhesive sealant for car windows
 Sealant gun
| 1. |
Install the roof side moulding.
|
| 2. |
Install the movable glass.
|
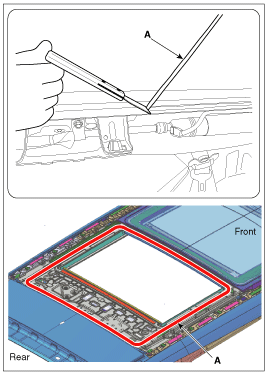
| 3. |
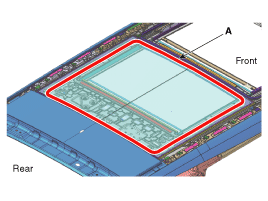
Use a blade to cut off residual sealant (A) around body panel.
|

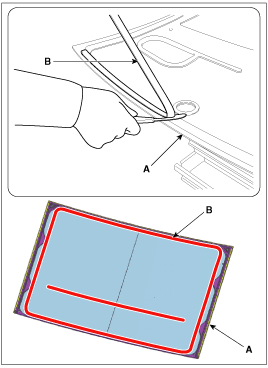
| 4. |
If rear glass (A) is reused, use a blade to remove residual sealant
(B) around the body panel.
|
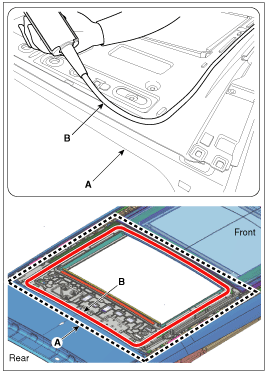
| 5. |
Use alcohol or an air gun to clean up the edges of the body panel
and rear glass.
|
| 6. |
Use a sealant gun to apply sealant (B) around body panel (A).
|
| 7. |
Install the rear glass (A) loosely on the body panel.
|
| 8. |
Check step and gap before rear glass (A) is fully mounted.
|
| 9. |
Apply tape to around the rear glass to prevent the glass from
coming off.
|
 Rear Glass Removal
•
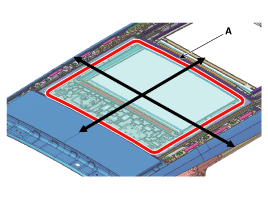
In order to remove the rear glass, use the tools shown
in the following figure:
...
 Panorama Sunroof Deflector Replacement
1.
Completely open the movable glass using the panorama sunroof switch.
2.
Loosen he mounting screws (A) located at the side of the panorama
...
See also:
Curtain Airbag (CAB) Module. Removal
1.
Disconnect the battery negative cable and wait for at least thirty
seconds before beginning work.
2.
Remove the roof trim assembly.
...
Rear Transverse Trim Replacement
•
Put on gloves to protect your hands.
...
Sunroof open warning (if equipped)
If the driver removes the ignition key (smart key: turns off the engine) when
the sunroof is not fully closed, the warning chime will sound for a few seconds
and a message will appear on the L ...