 Kia Soul: Front Driveshaft Replacement
Kia Soul 2014-2019 PS Service Manual / Driveshaft and axle / Driveshaft Assembly / Front Driveshaft Replacement
| 1. |
Loosen the wheel nuts slightly.
Raise the vehicle, and make sure it is securely supported.
|
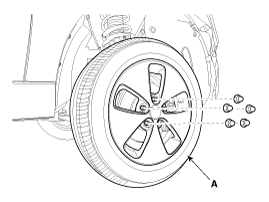
| 2. |
Remove the front wheel and tire (A) from front hub.
|

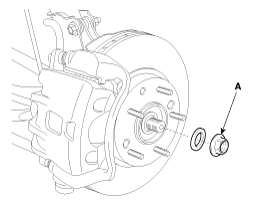
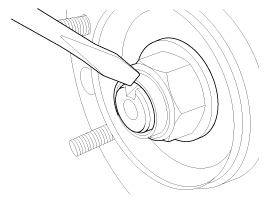
| 3. |
Remove the driveshaft coking nut (A).
|
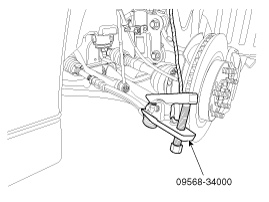
| 4. |
Remove the tie rod end ball joint (C) from the knuckle by using
the SST (09568-34000).
|
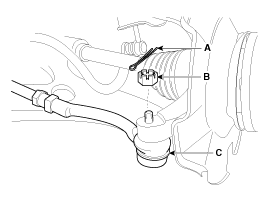
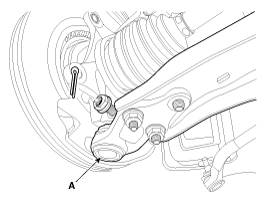
| 5. |
Remove the lower arm (A) from the knuckle.
|
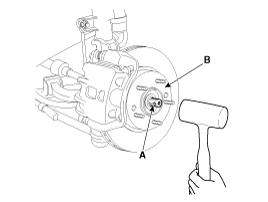
| 6. |
Using a plastic hammer, disconnect driveshaft (A) from the axle
hub (B).
|
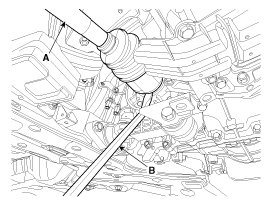
| 7. |
Insert a pry bar (A) between the transaxle case and joint case,
and separate the drive shaft (B) from the transaxle case.
|
| 8. |
Install in the reverse order of removal.
|
| 9. |
Check the front alignment.
(Refer to Suspension System - "Front Alignment")
|
 Front Driveshaft Component
1. Driveshaft (LH)
2. Circlip
3. Driveshaft (RH)
...
 TJ Joint Components
[LH]
1. BJ assembly
2. BJ circlip
3. BJ boot band
4. BJ boot
5. Shaft
6. TJ boot band
7. TJ boot
8. Spider assembly
9. Snap ring
10. TJ h ...
See also:
Cylinder Head Cover Components
1. Cylinder head cover
2. Cylinder head cover gasket
3. Cam position sensor
...
Before starting
Close and lock all doors.
Position the seat so that all controls are easily reached.
Adjust the inside and outside rearview mirrors.
Be sure that all lights work.
Check all gauges.
Check ...
Preset
Press the
key
~
Briefly pressing the key (under 0.8 seconds): Plays the frequency saved
in the corresponding key.
Pressing and holding the key (over 0.8 seconds): Pressing and hol ...