 Kia Soul: Cooling Fan Removal and Installation
Kia Soul 2014-2019 PS Service Manual / Engine Mechanical System / Cooling System / Cooling Fan Removal and Installation
Cooling fan assembly
| 1. |
Disconnect the battery negative terminal.
|
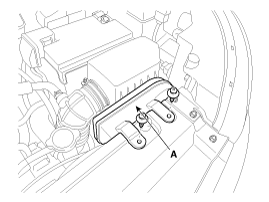
| 2. |
Remove the air duct (A).
|
| 3. |
Separate the filler neck (A) from the radiator upper member assembly.
|
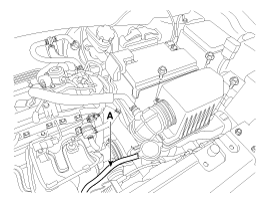
| 4. |
Disconnect the radiator reservoir hose (A).
|
| 5. |
Remove the hood lower latch.
(Refer to Body - "Hood Latch")
|
| 6. |
Remove the engine room under cover.
(Refer to Engine And Transaxle Assembly - “Engine Room Under Cover”)
|
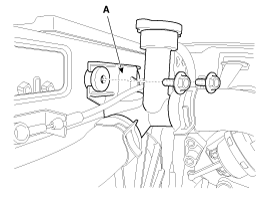
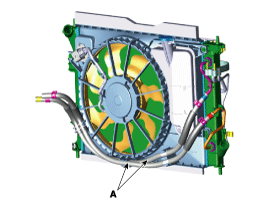
| 7. |
Separate the ATF cooler hoses (A) from the holders on the cooling
fan assembly. (A/T only)
|
| 8. |
Remove the front bumper cover.
(Refer to Body - "Front Bumper Cover")
|
| 9. |
Remove the headlamps.
(Refer to Body Electrical System - "Head Lamps")
|
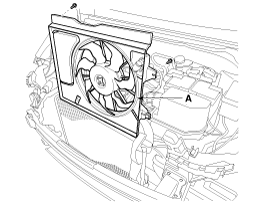
| 10. |
Remove the radiator upper member assembly (A).
|

| 11. |
Disconnect the cooling fan connector (A).
|
| 12. |
Remove the cooling fan (A) from the vehicle.
|
| 13. |
Install in the reverse order of removal.
|
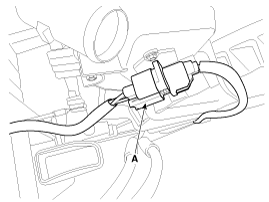
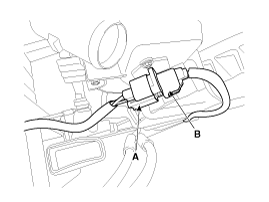
Resistor
| 1. |
Disconnect the wire harness connector (A) and the fan motor connector
(B).
|
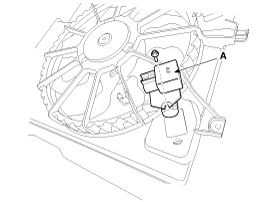
| 2. |
Remove the resistor (A) from the cooling fan shroud.
|
| 3. |
Install in the reverse order of removal.
|

 Cooling Fan Disassembly
1.
Remove the cooling fan (A) from the cooling fan assembly.
2.
Disconnect the fan motor connector (A) from the resistor.
...
See also:
Heated Steering wheel. System Circuit Diagram
...
Tune
Rotate
TUNE knob : Changes the channel number or scrolls category list.
Press
TUNE knob : Selects the menu.
...
Battery Removal
1.
Turn the ignition switch OFF and disconnect the battery negative
(-) cable (A).
2.
Disconnect the positive (+) terminals (B) from the ba ...