 Kia Soul: CVVT & Camshaft Removal
Kia Soul 2014-2019 PS Service Manual / Engine Mechanical System / Cylinder Head Assembly / CVVT & Camshaft Removal
| 1. |
Remove the cylinder head cover.
(Refer to Cylinder Head Assembly - "Cylinder Head Cover")
|
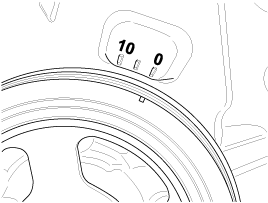
| 2. |
Turn the crankshaft damper pulley so that No. 1 piston is at top
dead center.
|

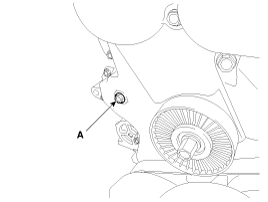
| 3. |
Remove the exhaust oil control valve (OCV) adaptor (A).
|
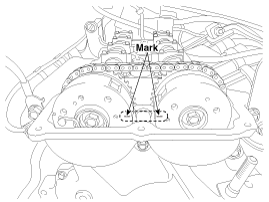
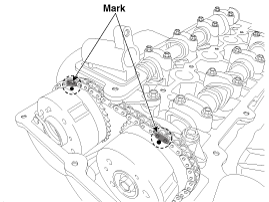
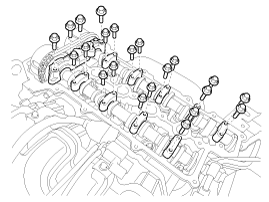
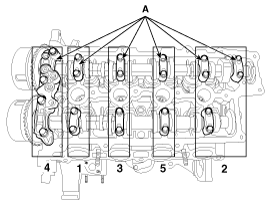
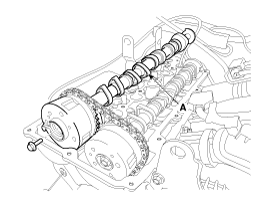
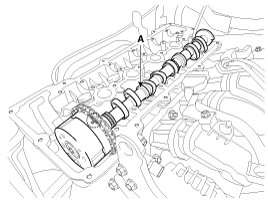
| 4. |
Remove the camshaft bearing caps (A) in the order shown in the
picture.
|
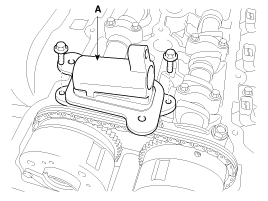
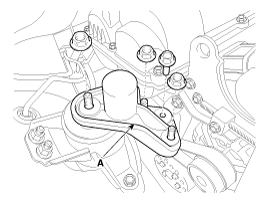
| 5. |
Remove the engine mounting support bracket.
|
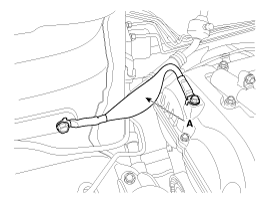
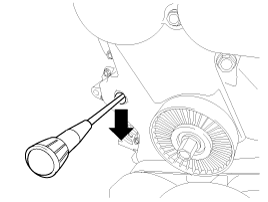
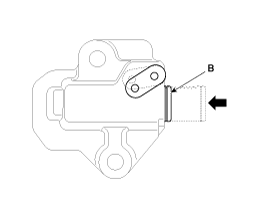
| 6. |
Remove the bolt (A) from the service hole in the timing chain
cover.
|
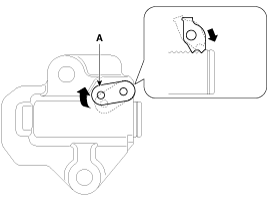
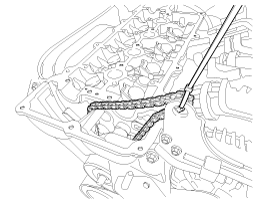
| 7. |
Lock the timing chain tensioner in the fully retracted position.
|
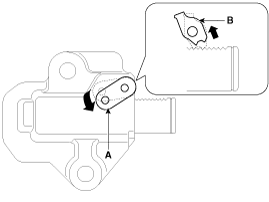
| 8. |
Separate the exhaust camshaft (A) from the exhaust CVVT by removing
the bolt.
|
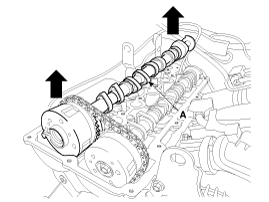
| 9. |
Remove the exhaust CVVT (A) from the timing chain.
|
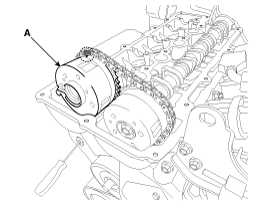
| 10. |
Remove the intake CVVT & camshaft (A).
|
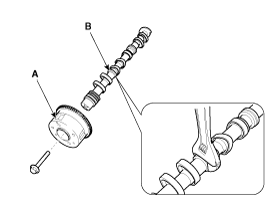
| 11. |
Remove the intake CVVT (A) from the intake camshaft (B).
|

 [CVVT System Mode]
(1) Low Speed / Low Load
(2) Part Load
(3) Low Speed / High Load
(4) High Speed / High Load
...
 CVVT & Camshaft Inspection
Camshaft
1.
Measure the height of the cam lobe using a micrometer and check
the surface of the cam lob for wear and tear. If necessary, replace
the camshaft.
...
See also:
Heater Unit Components
[LH]
1. Foot shower left duct
2. Motor&Wheel assembly
3. Mode actuator motor assembly
4. Cam mode
5. Defroster door lever
6. Defroster door ARM
7. Ventila ...
Air cleaner filter Inspection
1.
Remove the air filter.
2.
Visually check that the air filter is not excessively damaged
or oily. If necessary, replace the air filter.
...
Refrigerant Leak Test
Always conduct a leak test with an electronic leak detector whenever leakage
or refrigerant is suspected and when conducting service operations which are
accompanied by disassembly or looseni ...