| •
|
Put on gloves to protect your hands.
|
|
| •
|
When prying with a flat-tip screwdriver, wrap it with
protective tape, and apply protective tape around the related
parts, to prevent damage.
|
| •
|
Take care not to scratch the body surface.
|
|
|
1. |
Remove the tail gate trim.
(Refer to Tail Gate - "Tail Gate Trim")
|
|
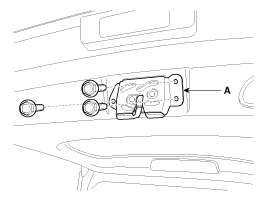
2. |
After loosening the mounting bolts, then remove the tail gate
latch assembly (A).
Tightening torque :
6.9~10.8 N.m (0.7~1.1 kgf.m, 5.1~8.0 lb-ft)
|
|
|
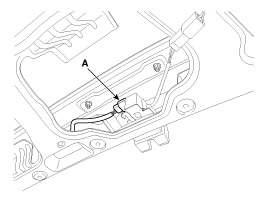
3. |
Disconnect the tail gate latch connector (A).
|
|
4. |
Install in the reverse order of removal.
|
• |
Make sure the tail gate locks/unlocks and opens/closes
properly.
|
|
• |
Adjust the tail gate alignment.
|
|
• |
Make sure the connectors are connected in properly.
|
|
|
1. Tail gate latch assembly
...
1. Tail gate back panel
...
 Kia Soul: Tail Gate Latch Replacement


 Tail Gate Latch Component Location
 Tail Gate Back Panel Component Location