 Kia Soul: Roller Blind Installation
Kia Soul 2014-2019 PS Service Manual / Body (Interior and Exterior) / Panorama Sunroof / Roller Blind Installation
| 1. |
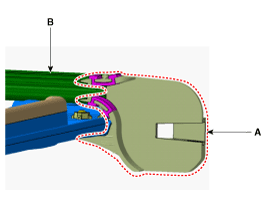
Install the roller blind side bracket (A) fit into the guide groove
(B).
|
| 2. |
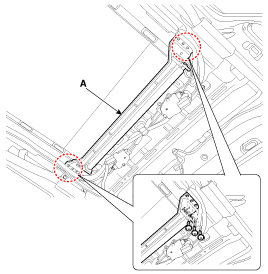
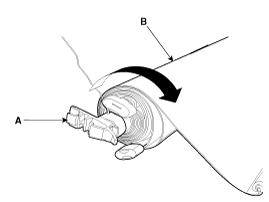
Tighten the mounting screws after installing the roller blind
lower support (A).
|
| 3. |
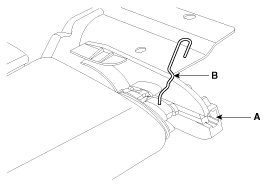
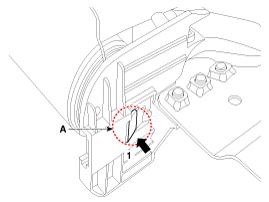
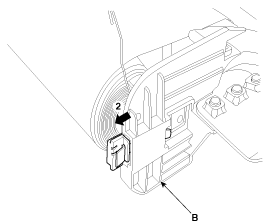
Remove the fixed pin (B) located inside the right side roller
blind side bracket (A).
|
| 4. |
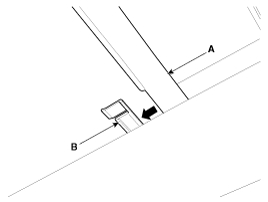
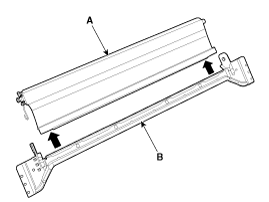
Install the roller blind bar (A) on top of the roller blind shoe
(B).
|
| 5. |
Put the roller blind bar (A) into the roller blind shoe (B).
|
| 6. |
Install the roof trim.
|
| 7. |
Completely close the movable glass using the panorama sunroof
switch.
|
 Roller Blind Removal
1.
Open the roller blind using the panorama sunroof switch.
...
 Panorama Sunroof Assembly Removal
•
In order to remove the panorama sunroof assembly, use
the tools shown in the followi ...
See also:
Ignition Coil Circuit Diagram
[MT]
[AT]
...
Reducing the risk of a rollover
This multi-purpose passenger vehicle is defined as a Crossover Utility Vehicle
(CUV). CUV’s have higher ground clearance and a narrower track to make them capable
of performing in a wide variety ...
Crankshaft Components
1. Crankshaft sprocket s
2. Crankshaft thrust bearing
3. Crankshaft upper main bearing
4. Crankshaft
5. CKPS wheel
6. Crankshaft lower main bearing
7. Crankshaft ma ...

