 Kia Soul: Receiver-Drier Replacement
Kia Soul 2014-2019 PS Service Manual / Heating,Ventilation And Air Conditioning / Air conditioning System / Receiver-Drier Replacement
| 1. |
Remove the condenser.
|
| 2. |
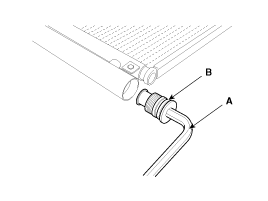
Remove the cap (B) on the bottom of the condenser with a L wrench
(A).
|
| 3. |
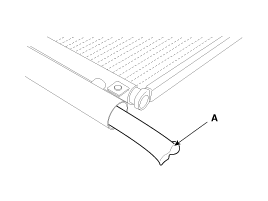
Remove the receiver-drier (A) from condenser using a long nose
plier. Check for crumbled receiver-drier and clogged bottom cap filter.
|
| 4. |
Apply air conditioning compressor oil along the O-rings and threads
of the new bottom cap.
|
| 5. |
Insert a new receiver-drier into the receiver drier tank. The
receiver-drier must be sealed in vacuum before it is exposed to air
for use.
|
| 6. |
Install a new bottom cap to the condenser.
|
 Condenser Replacement
1.
Recover the refrigerant with a recovery/recycling/charging station.
2.
Disconnect the negative (-) battery terminal.
3.
...
 A/C Pressure Transducer Description
The A/C Pressure Transducer (APT) converts the pressure value of high
pressure line into voltage value after measuring it. By converted voltage value,
engine ECU controls the cooling fan by o ...
See also:
Components Location
1. Automatic transaxle
2. Valve body assembly
3. Oil pump assembly
...
Overview
Description
The trip computer is a microcomputer- controlled driver information system that
displays information related to driving.
✽ NOTICE
Some driving information stored in the trip co ...
Intake Manifold Removal and Installation
1.
Remove the engine cover.
2.
Disconnect the battery negative terminal.
3.
Remove the air cleaner assembly.
...


