 Kia Soul: Headrest
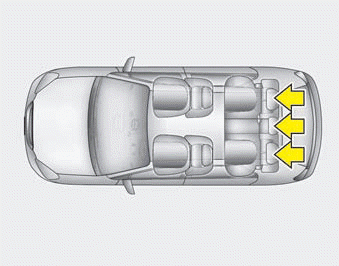
The rear seat(s) is equipped with headrests in all the seating positions for the occupant's safety and comfort.
The headrest not only provides comfort for passengers, but also helps protect the head and neck in the event of a collision.
For maximum effectiveness in case of an accident, the headrest should be adjusted so the middle of the headrest is at the same height of the center of gravity of an occupant's head. Generally, the center of gravity of most people's head is similar with the height as the top of their eyes.
Also adjust the headrest as close to your head as possible. For this reason, the use of a cushion that holds the body away from the seatback is not recommended.
WARNING - Headrest removal
Do not operate the vehicle with the headrests removed. Headrests can provide critical neck and head support in a crash.
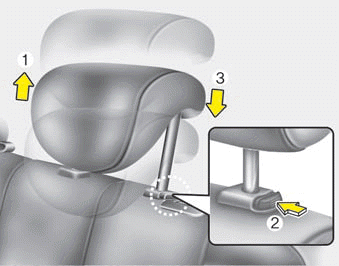
Adjusting the height up and down
To raise the headrest, pull it up to the desired position (1). To lower the headrest, push and hold the release button (2) on the headrest support and lower the headrest to the desired position (3).
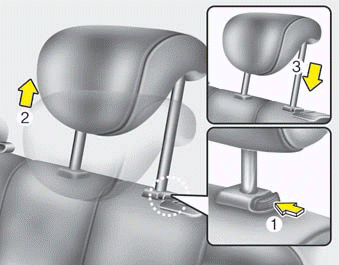
Removal and installation
To remove the headrest, raise it as far as it can go then press the release button (1) while pulling the headrest up (2).
To reinstall the headrest, put the headrest poles (3) into the holes while pessing the release button (1). Then adjust it to the appropriate height and ensure that it locks in position.
 Folding the rear seat
The rear seatbacks can be folded to facilitate carrying long items or to increase
the luggage capacity of the vehicle.
WARNING - Folded down seatback
Never allow passengers sit on top of the folde ...
 Seat belts
...
See also:
Fuel lines, hoses and connections Inspection
Visually check the fuel lines for cracks, leakage, loose connections,
deformation or tank band looseness. ...
ETC (Electronic Throttle Control) System. Specifications
Specification
[TPS1]
Item
Opening Percentage
(%)
Output Voltage (V)
[Vref = 5V]
C.T
7 ~ 13
0.35 ~ 0.65
W.O.T
88.6 ~ 94
...
Folding the rear seat
The rear seatbacks can be folded to facilitate carrying long items or to increase
the luggage capacity of the vehicle.
WARNING - Folded down seatback
Never allow passengers sit on top of the folde ...