 Kia Soul: Automatic transaxle Inspection
| Fluid level Check |
Automatic Transaxle Fluid(ATF) oil level check is usually unnecessary
during scheduled services. But if fluid leak is found, perform the fluid
level check procedure after repair is completed.
|
When checking the fluid level, be careful not to enter dust, foreign
matters, etc. from fill hole.
|
| 1. |
Remove the air cleaner assembly.
(Refer to Engine Mechanical System - "Air cleaner")
|
| 2. |
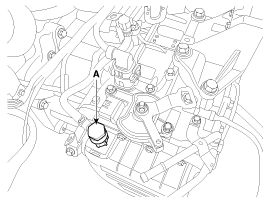
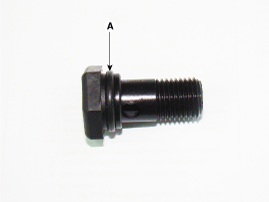
Remove the eyebolt (A).
|
| 3. |
Add ATF SP-IV 700cc to the ATF injection hole.
|
| 4. |
Start the engine.
|
| 5. |
Confirm that the temperature of the A/T oil temperature sensor
is 50~60°C (122~140°F) with the GDS.
|
| 6. |
Shift the select lever slowly from “P” to “D”, then “D” to “P”
and repeat one more at idle.
|
| 7. |
Remove the under cover.
(Refer to Engine Mechanical System - "Engine Room Under Cover")
|
| 8. |
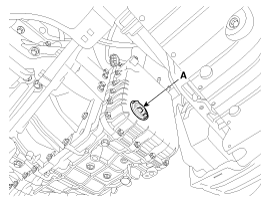
Remove the fluid level plug (A) from the valve body cover.
|
| 9. |
If the fluid flows out of the overflow plug in thin steady stream,
the fluid level is correct.
Then finish the procedure and tighten the fluid plug.
|
| 10. |
Install the under cover.
(Refer to Engine Mechanical System - "Engine Room Under Cover")
|
| 11. |
Lower the vehicle with the lift and then tighten the eyebolt.
|
| 12. |
Install the air cleaner assembly.
(Refer to Engine Mechanical System - "Air cleaner")
|
 Air cleaner filter Cleaning
1.
Blow compressed air as shown in the illustration to clean it.
...
 Automatic transaxle Replacement
1.
Remove the under cover.
(Refer to Engine Mechanical System - "Engine Room Under Cover")
2.
Remove the drain plug (A) and dr ...
See also:
Knock Sensor (KS). Description and Operation
Description
Knocking is a phenomenon characterized by undesirable vibration and noise
and can cause engine damage. Knock Sensor (KS) is installed on the cylinder
block and senses engine knoc ...
Output Speed Sensor. Description
The output speed sensor is a vital unit that measures the rate of rotation
of the transaxle's turbine shaft and output shaft, and delivers the readings
to the TCM. The sensor provides cri ...
Changing a tire with TPMS
If you have a flat tire, the Low Tire Pressure telltale will come on. Have the
flat tire repaired by an authorized Kia dealer as soon as possible or replace the
flat tire with the spare tire.
CAU ...


