 Kia Soul: Roof Trim Assembly Replacement
Kia Soul 2014-2019 PS Service Manual / Body (Interior and Exterior) / Roof Trim / Roof Trim Assembly Replacement
|

|

| 1. |
Remove the rear seat assembly.
(Refer to Rear Seat - "Rear Seat Assembly")
|
| 2. |
Remove both sides of the front pillar trim.
(Refer to Interior Trim - "Front Pillar Trim")
|
| 3. |
Remove both sides of the canter pillar upper trim.
(Refer to Interior Trim - "Center Pillar Trim")
|
| 4. |
Remove both sides of the rear pillar trim.
(Refer to Interior Trim - "Rear Pillar Trim")
|
| 5. |
Remove both sides of the sunvisor and retainer.
(Refer to Roof Trim - "Sunvisor")
|
| 6. |
Remove both sides of the assist handle.
(Refer to Roof Trim - "Assist Handle")
|
| 7. |
Remove the overhead console lamp.
(Refer to Body Electrical System - "Overhead Console Lamp")
|
| 8. |
Remove the room lamp.
(Refer to Body Electrical System - "Room Lamp")
|
| 9. |
Tilt the front seat back towards the rear of the vehicle as far
as possible.
|
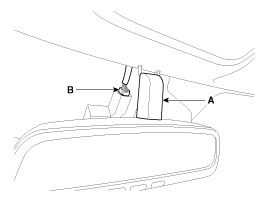
| 10. |
Remove the ECM mirror cover (A).
|
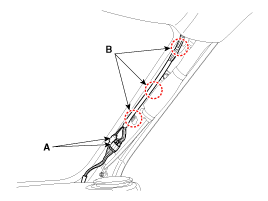
| 11. |
Disconnect the ECM mirror connector (B).
|
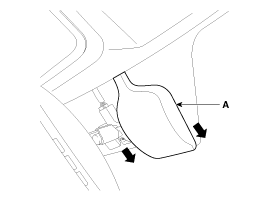
| 12. |
Remove the LDWS cover (A).
|
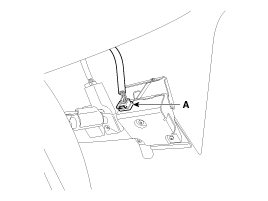
| 13. |
Disconnect the LDWS unit connector (A).
|
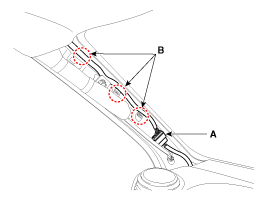
| 14. |
Disconnect the roof trim main connector (A) and the mounting clips
(B) in the front pillar.
[Driver's]
[Passenger's]
|
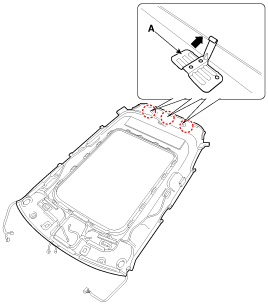
| 15. |
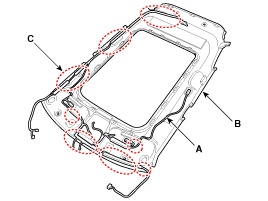
Using a clip remover, detach the roof trim assembly mounting clips
(A).
|

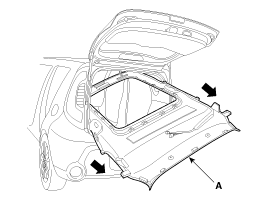
| 16. |
Slighty remove the tail gate weatherstrip.
|
| 17. |
Slightly lower the rear side of the roof trim.
|
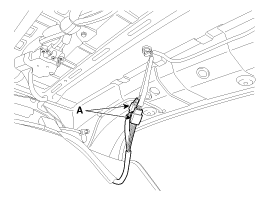
| 18. |
To remove the roof trim, press the lock pin (A) in the direction
of the arrow.
|
| 19. |
Before removing the roof trim, slightly lower the roof trim and
disconnecting the roof antenna connectors (A).
|
| 20. |
Remove the roof trim assembly (A) from the vehicle through the
tail gate.
|
| 21. |
Remove the vanity lamp.
(Refer to Body Electrical System - "Vanity Lamp")
|
| 22. |
Remove the hands free mic.
(Refer to Body Electrical System - "Hands Free Mic")
|
| 23. |
Remove roof trim wiring harness (A) from the roof trim assembly
(B).
|

| 24. |
Install in the reverse order of removal.
|
 Roof Trim Assembly Component Location
1. Roof Trim Assembly
...
 Tail Gate
...
See also:
Component Location
1. Fender assembly
...
ESC operation off
ESC OFF state
To cancel ESC operation, press the ESC OFF button (ESC OFF indicator light
illuminates).
If the ignition switch is turned to LOCK position when ESC is off, ESC remains
off. ...
Sunshade
When opening the sunroof, the sunshade will also open. Once the sunroof is closed,
the sunshade can be manually closed. ...